skip to main |
skip to sidebar
In this post I will be showing you how I make my pumpkins with witches hat.I seem to make allot of pumpkins,there is just something about that round cuteness that I can't resist! I think it's a disorder ,yea that's it ! It is SCPHD "Sculpting Clay Pumpkin with Hat Disorder .OK so now that I have cleared that up .
Lets get started
Supplies
Clay (can be any type you want ,I used original Sculpty ,not because I like it better .But that it was a good price and soft enough for my hands to knead)
Sculpting pick /dentist tool-(anything that can make a impression like a tooth pick would work to)
 Oven/toaster oven is what
I use .Cooked clay gives off fumes so be careful with pets if baking in a small none ventilated place .Open a window or turn on a fan.
A ink pin(I used the cap because it had a hole in it ,but you can just use the pin to .)
Now the fun part.
I have no set amount of clay that I use.You can use as much
or as little to make these .The size is up to you ,but I make medium to small ones.
Oven/toaster oven is what
I use .Cooked clay gives off fumes so be careful with pets if baking in a small none ventilated place .Open a window or turn on a fan.
A ink pin(I used the cap because it had a hole in it ,but you can just use the pin to .)
Now the fun part.
I have no set amount of clay that I use.You can use as much
or as little to make these .The size is up to you ,but I make medium to small ones.
 |
| Hat ball |
 |
roll on one side
so looks like this |
Take a ball of clay and knead it until it is soft and workable. Pinch off some clay about the size of a marble,then another piece a little bigger.This will be the pumpkin and the hat .The larger ball is for the pumpkin because I like the hat to fit at an angle. set the larger piece aside.take the smaller ball and roll it between your thumb and forefinger.You want to have it in a cone shape so the most pressure should be focused on one side of the ball.
 |
| push down to form hat brim |
Next set it on a clean surface with the bigger end down .Now you want to smooth down to
 |
| hat brim |
form the brim of the hat .Once you have the basic brim pick the clay up and put on thumb .Using forefinger to make the brim thinner and bigger by smoothing down .Turn your clay and repeat until you have the brim the size you want.
 |
| hat brim |
 |
| using your thumb and smoothing out for hat prim |
 |
| hat brim made |
 |
| 1st indent then fold on itself |
Next use a toothpick or a tool small enough to make an indention on one side ,top part of the hat see picture A(image is of the second in dent ,But you see what I am talking about) After yo make the dent you will gently fold it in on itself .Now make another indent on the other side and fold .
 |
| Picture A |
 |
| the hat with its 2 folds |
 |
| pinch of clay for the hat band |
Set the hat to the side .Now take a pinch of clay and roll it out into a thin roll .Using your finger flatten it making it as even as you can.This will be the band on the hat .
 |
| roll it out |
 |
| flatten it for the band |
 |
| wrap around the hat above the hat brim |
Now wrap the flat piece around the hat brim .pressing slightly so that it will stick.Using your tool cut it off where it joined the beginning band.
 |
| cut off excess |
 |
smaller pinch for hat band
buckle |
Take a small piece of clay and roll it into a ball and slightly flatten it.Then place it on the band where it joined .(see images)
 |
| attach to band where it join |
 |
| using a toothpick or tool to make it square |
Now take your tool and make a square buckle like in the image. You simply bush your tool inside the clay on 4 sides see the red on the square that is how you will form the buckle. You will have a bump of clay on the inside and a long line of clay on the outside giving it a buckle look .Tap the outside to give it a square shape and the buckle is done.
 |
| the red indicated where to push on the clay to make the buckle |
 |
| hat done |
Next is the pumpkin.Take the larger ball of clay and roll it smooth.Place it on a clean surface.I used a lip balm tube to make my indention because it made them look cute.You can use anything you want to make the indention on your pumpkin.
 |
push in on the pumpkin to form the
indention |
 |
| roll your tool up toward the top of the ball |
Push in the clay and roll upward to the top of the ball of clay.
Do this all the way around the ball of clay
This is what it will look like after you have all the indention made.
 |
B-
pin cap |
 |
| finished indention |
 |
C-
push down in center of pumpkin |
Not take your pin and push into the center top of the pumpkin this will give you a space for the leaves to sit . See the images B and C
 |
This is what it will look like after using the
pin |
 |
| squash gently down |
Now take your finger and GENTLY push down a little more to give it a squashy look (pumpkins are not usual perfectly round )
 |
D-
indent in between and half
way down. |
Now take your tool again and put indention from top to half way down to bottom (between the whole indention's see image D)
 |
| pumpkin -this is what it looks lie when finished |
 |
| leaf ball |
Now for the leaf.Take a bit of clay and roll it to a tear drop shape.
 |
| leaf tear drop shape |
 |
| flatten tear drop |
Next flatten it between fingers. It should look like image E
 |
E-
flatten tear drop leaf |
 |
| leaf |
 |
| make a indention in middle of leaf |
now using tool and make a indention down the center of the leaf It will look like image F.
 |
F-
indention down middle of leaf |
Now make even marks on each side of the indention being careful not to cut into the middle indention . Image G.
 |
G-
indention evenly on each side |
 |
| finished leaf |
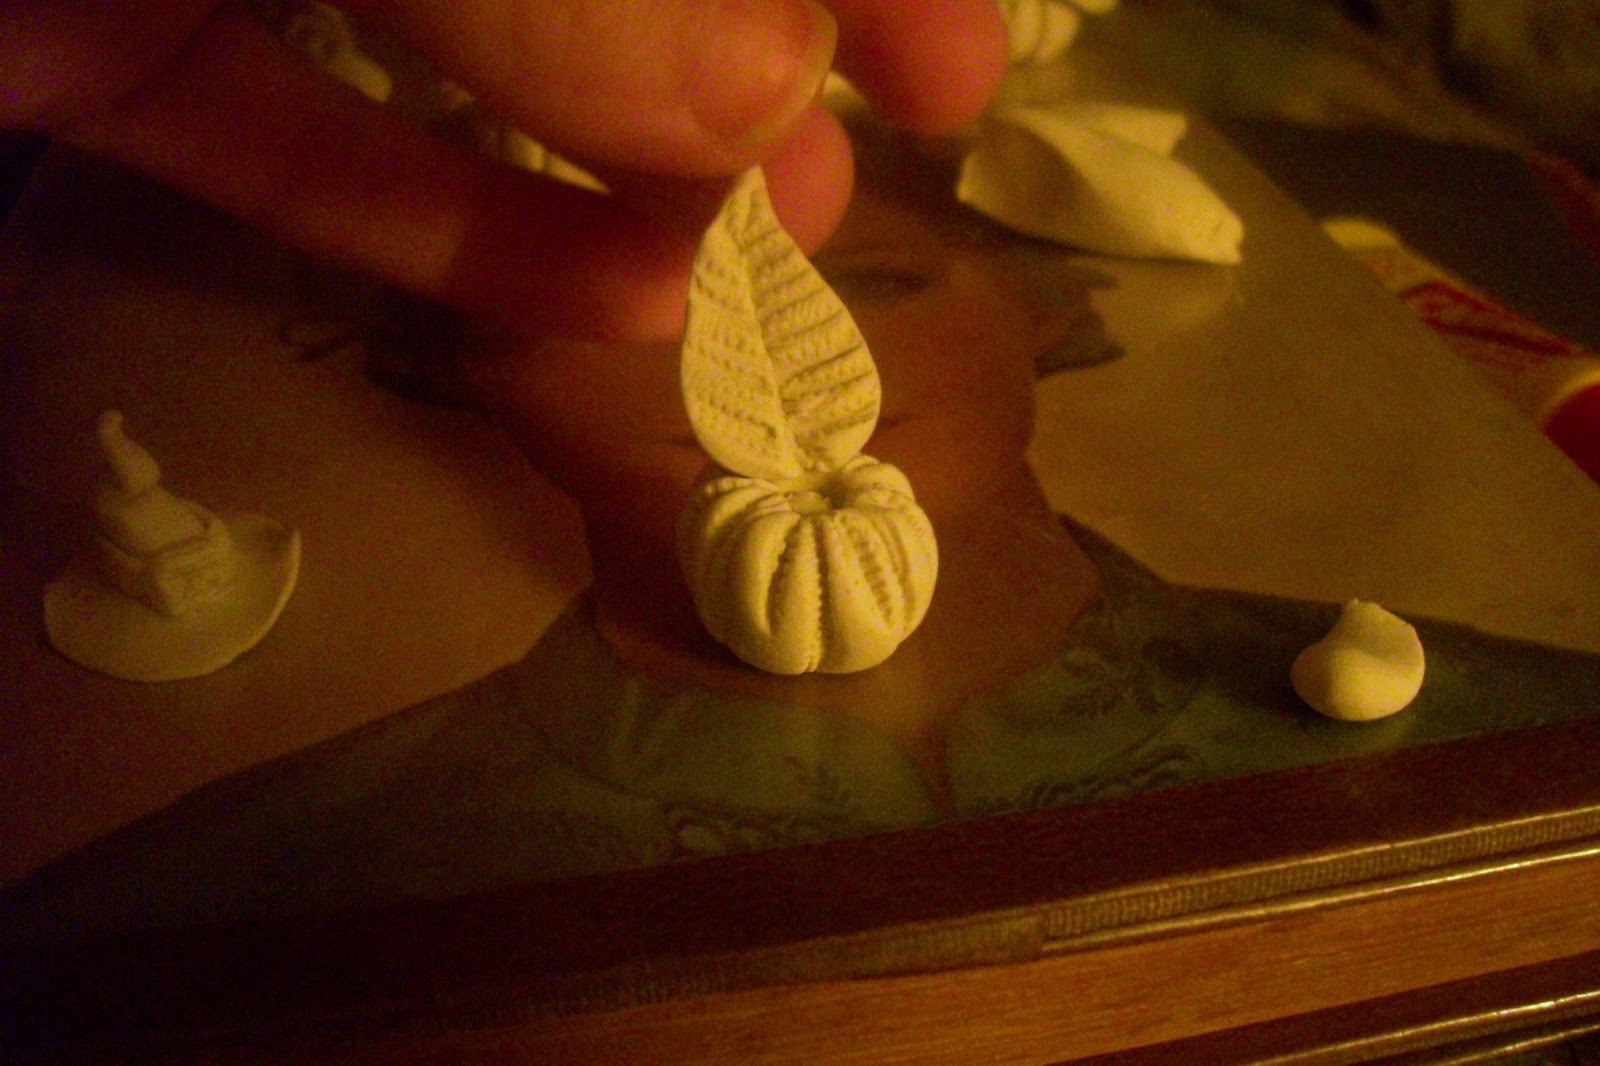
Now place leaf on pumpkin.Make 1 or 2 more smaller leaf and lightly attach them to the other leaf .
 |
| 2 leafs on pumpkin |
 |
| curled leaf slightly |
Now you can lightly curl the leaf by pushing gently up on the leaf from the underside .Play with it till it is the way yo want it.
 |
| set hat on top |
Set your hat on top ,I like to put it on and angel I
think it looks cute that way. But you can set it however you want it.
 |
| Finished pumpkin with witch hat |
There it is so cute! If you use clay to be baked ,I usually take it apart and cook the hat ,pumpkin and leaves alone so I can paint them without messing it up .Meaning I have tried cooking it all put together and when I painted it I was repainting it over again because I got paint on the parts I already painted. SO FRUSTRATING! After I paint them and Let them dry I use a little bit of E6000 to glue them together. and that's it .If you make any I would love to see the finished product. Just email or post a comment with a link.
Enjoy creating and
Remember
Have fun doing what you Love
and
Love what you aredoing


 Oven/toaster oven is what


2 comments:
Hi there! Thanks so much for popping in at my blog and joining. I've joined yours now too. I'm enjoying browsing your blog! So much creativity!!
Thanks! That makes me want to do a jingle bell dance!
Post a Comment